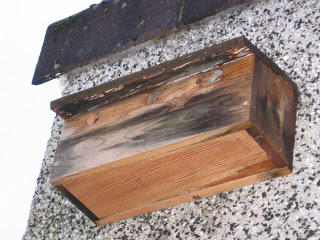
Last March we put up a Terrace Nestbox which was successfully used by one or more Blue Tits. Details of the success of this Nestbox can be seen on the link https://www.shirlsgardenwatch.co.uk/2006/11/preparations-for-winter-birds.html . Unfortunately the box unit itself has not been a success. Rain damaged the exterior and it looked unsightly as seen below. We felt the need to replace this unit with another the same seeing as the Blue Tits have started to show interest again – none have been spotted going in yet so hopefully we will have made the replacement in time.
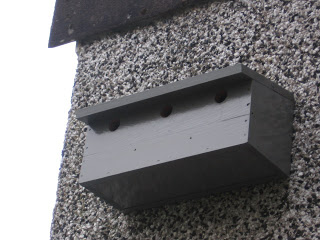
New Nestbox Terrace, shown above, went up late yesterday afternoon in the cold winds but at least we managed to miss the rain and got it up before it got dark. We needed to get it up this weekend. The new box has been given further treatments to help it withstand the weather – so we will see how this one goes! At the moment it looks all shiny and new – but it will weather soon enough and blend in with the wall. We used a coloured stain, three coats, then topped this off with two coats of satin yacht varnish.
We left the entrance hole with no extra treatment as the birds, last year, pecked around the holes from the inside before they started building their nests. When we took the old box down we were able to see the full extent of the water damage – even the entrance holes were affected. I really doubt that the birds would have nested in it – unless they saw it as a DIY challenge!
Building your own Nestbox would be even more rewarding – should the birds choose to use it. The RSPB and BBC Nature websites have details on how to make one, for details follow the links http://www.rspb.org.uk/advice/helpingbirds/nestboxes/nestboxes/making.asp and http://www.bbc.co.uk/nature/animals/birds/thingstodo/nestbox.shtml .
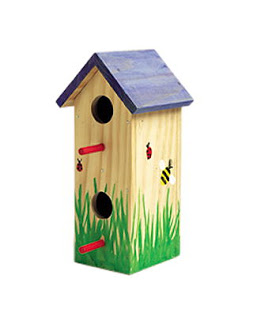
Children too could be encouraged to build a Nestbox. My daughter was given a kit from a friend as a Christmas gift and plans to build it this week, see picture below. This kit, age 8 years+, comes with pre-cut wood parts, paint, paintbrush, sandpaper, nails and glue. It was bought from ‘Boots’ the Chemist – for details see link http://www.boots.com/shop/product_details.jsp?productid=1050839&classificationid=1020583 . We originally bought the yacht varnish, used in our Nestbox Terrace, to protect this unit as the wood is untreated.
 Robin Nestbox, shown below, this was originally put up last November by my daughter when she was doing her school Bird Project. We have made a change with this Nestbox too. Since we put up this box I have spotted the Sparrowhawk perched on distant trees and on the top of our other hedge, my garden is ‘L’ shaped, where it would be able to watch the entrance of the box. For the safety of the prospective occupants of the Robin Nestbox we moved it round the face of the post on my pergola. An added advantage of this is I can now see the entrance from windows – so could possibly get video clips and photographs.
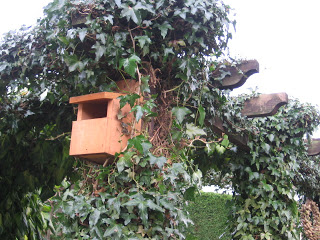 The photograph of the original next box was taken on January 14th 2007. The photographs of the New Nestbox and the relocated Robin Nestbox were taken today, January 15th 2007.