Small garden border changes, be they made for practical or pretty reasons, can transform the sense of space and feel of an area especially in a small garden. Although I love to create hidden wildlife feeding spaces in my garden I love creating hidden/surprise garden views and plantings even more. This summer I’ve enjoyed making a few small changes.
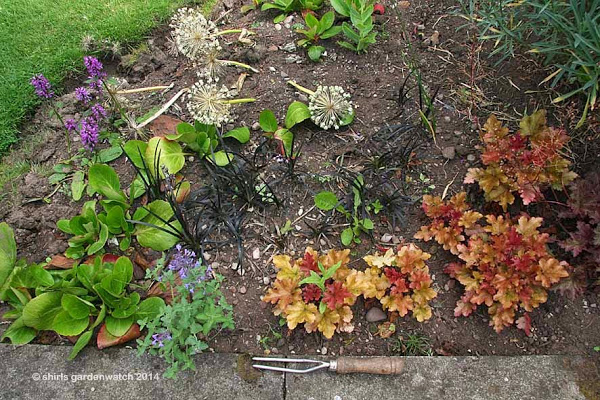
Let’s take a close looker look below at the 6ft x 2ft path edge in question for today with its sprinkling of weeds, spent flower blooms, grass turf lifted from pond edge (in another small change) and a temporary resident (catmint seedling forgotten about). Note the two pronged garden tool – my new fav garden tool for getting weeds (and seedlings) from around the centre of plants.
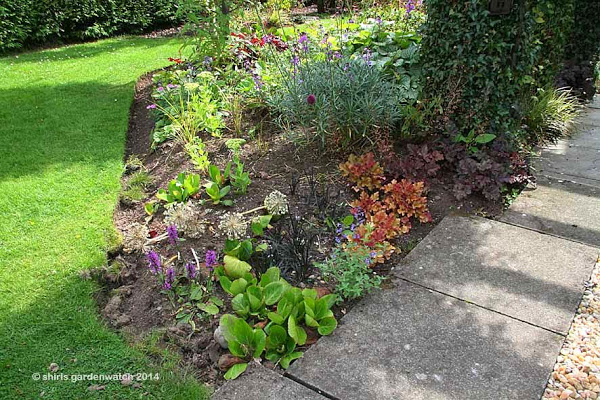
Now, that’s better. We can see what we are working with but I’m worried about possibly forgetting I’ve allium bulbs planted there. Mmm… perhaps I could move the Betony (purple flowers loved by the bees) over to the left so the two plants grow together. That should work as the leaves of the allium should be gone before the betony starts coming into growth. We’ll see if this theory works next year 😉
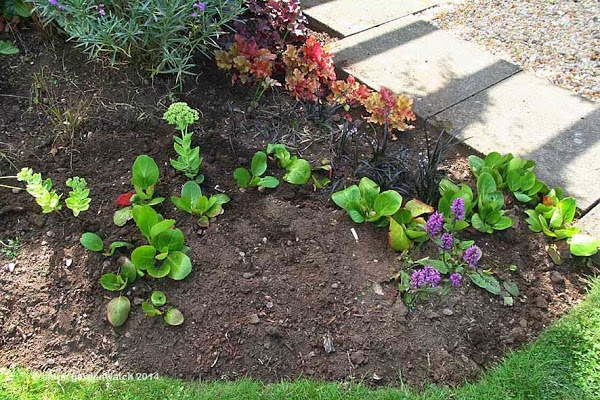
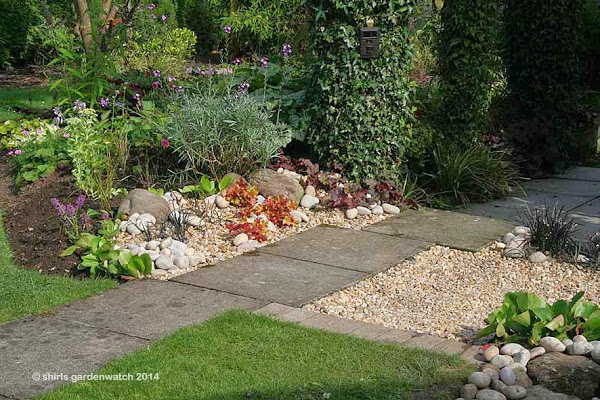
Ah yes… and I’ll move about the Bergenia plants so they act as an edge to keep the gravel out of the rest of the border. The plants are small here as I’ve been dividing them but they will become a great green wall all year long and give a bounty of spring flowers as they mature.
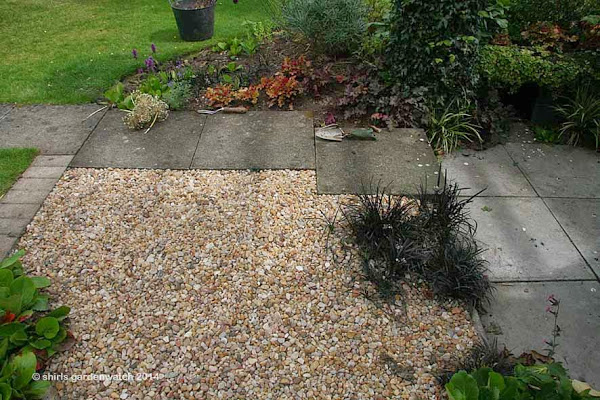
Okay, so two bags of North Sea pebbles were bought from the garden centre for this project. Although the original plan was to open up the path edge using them alone, it became clear that I needed a gravel base for this to work and be practical cost and weed wise. Let’s borrow some gravel from the other side of the path for now as time is short to get to the building supplier (since replaced).
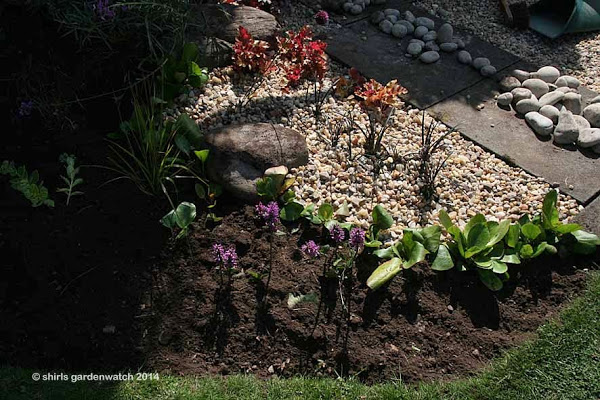
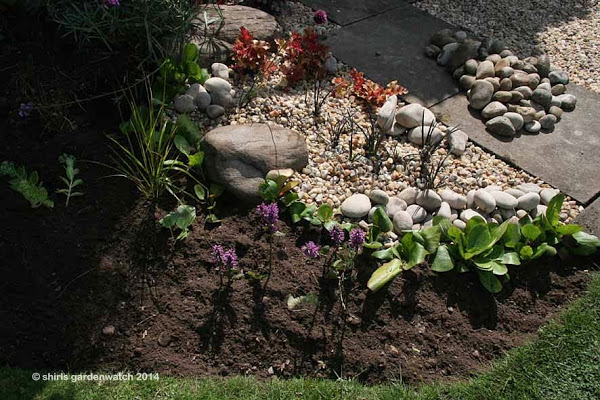
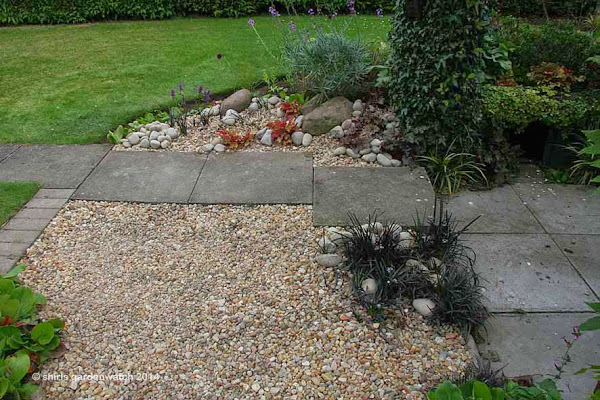
Three rocks no longer in use after other small garden changes were available to complete the retaining gravel wall. Placing the pebbles took a few attempts and I suspect I will change them yet. As the pebbles get covered with plant growth I’ll move some into the pond as I choose the same smooth ones in there. Rocks and stone, in this case pebbles, never go as far as you think they will. The pile on the path below is the contents of one bag.
When working close-up in a border like this it’s easy to forget the other garden views of it. This is not the view I had in mind when I began this border change anyway. Lets’ step back a little bit.
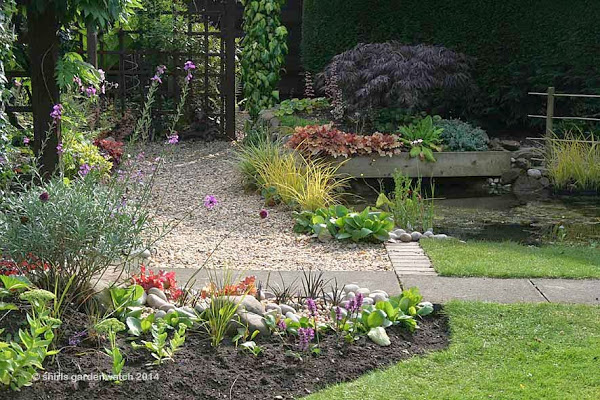
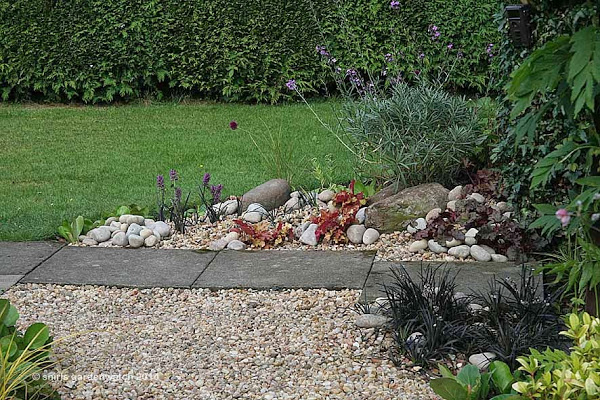
Now, I don’t want to see the gravel and pebbles from the other side of this border. Ok, I’m pretty happy that the grasses (lifted from another border), the Bergenia and the Erysimum ‘Bowles’s Mauve’ Wallflower ‘ will grow considerably making a screen from the lawn side so job done from this view 🙂
Looking at this longer view the eye is drawn over to the Bergenia and pebbles at the corner edge of my new wildlife pond. This is exactly why I wanted to repeat use them on the corner edge of this border.
For a good few years now, I have gardened by carrying colours and plantings over and through neighbouring borders. I have a small garden and this way everything is connected and my garden space feels bigger. Now the pebbles have connected my wildlife pond to the garden borders 🙂
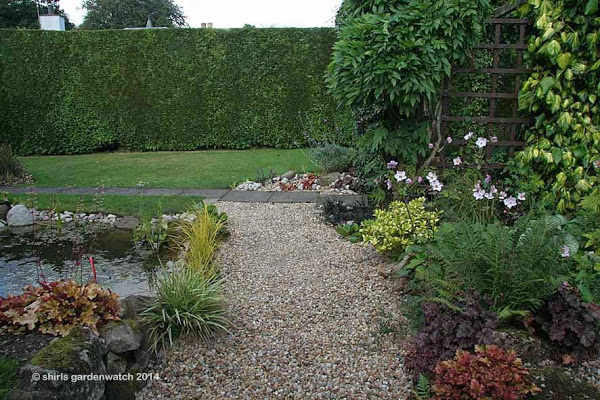
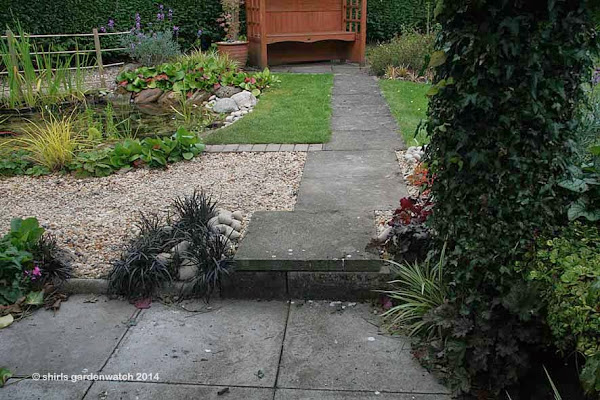
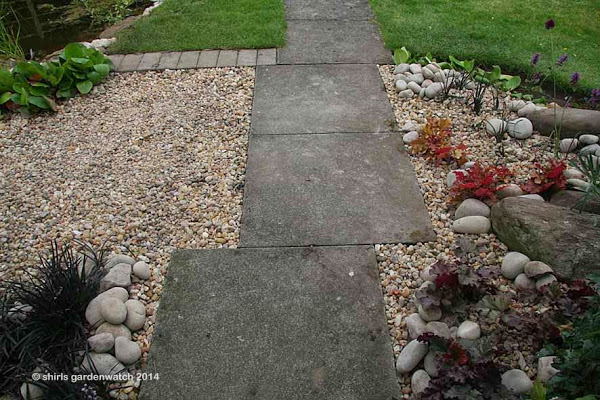
Looking towards the path edge below, pond side, you can see the row of higgledy paving slabs. This was the reason for this small border change but not the view I was considering either. However, my surprise here was that now the higgledy path line blends in to the gravel (a bit) and doesn’t become the end stop any more in long and short views. My eye now skips over the path and I’m very happy about that 🙂
So… to the reason for this garden border change… nope I wasn’t trying to do an Alan Titchmarsh type revamp to pretty up my border… not at all. My path edge, border change was a completely practical one – the step up from my under my Pergola on to my higgledy path. I needed more space.
This path towards our Arbour was in the garden when we came here. When our daughters were young this path headed straight to a wooden Wendy house. These paving slabs are old and very heavy and we’ve never really considered moving them. I lifted the gravel on the left to lay turf to connect the pond with the lawn and that has helped soften the path.
Not seen in the image above is my rotary washing dryer (whirly) which is sited on the grass to the left of the path when in use. When I planted the ivy up my pergola post there was plenty of space to step up on to my straight path but over the years the ivy has grown wider and wider!
This summer I finally had enough of being squished in to the ivy as I stepped up/down with a basket full of washing. I moved the first slab over to the left and the other two off centre with a pattern of paving bricks in mind to give an accessible open space for that rushed run to collect the washing when the rain comes on. Now on dry days, I take my time stepping up enjoying a garden view that I never considered when altering my path.
Perhaps it was fortunate that changes in UK law regarding paving requiring it to be permeable (porous) to prevent flooding made me unable to buy bricks to match the lawn edge ones beside my pond. I was forced to change my plan and although I considered a few options including a mosaic pattern of pebbles (uneven surface, no good for running with a basket of washing) this simple one has worked a treat for me 🙂
Yep… before, that path just wasn’t inviting at all…
It is now 🙂
Coincidentally, fellow blogger VP posted a blog yesterday morning on inspiration between the paving with some great images and chat. I have always loved this way of planting too and admired many gardens with it especially the Japanese ones with moss as VP mentions. Lisa over at Greenbow posted on path edges too where she is recycling old paving. If I had made this post brief as planned I would have been able to join them 🙂
Translating any garden style can be fun to experiment with and the inspiration we can get from garden visits and blogs gives us a great stepping stone. Ha-ha… or should I say stepping paving slab for this post 😉
Copyright: Original post published on https://www.shirlsgardenwatch.co.uk/ by blog author Shirley, August 12th 2014.
It does look attractive. Little tweaks in the garden make all the difference.
È tutto molto bello quell'angolo con la ghiaia e l'acqua e la scelta di piante mi sembra la migliore! Complimenti 🙂
I love your redo. The black grass with the larger stones in it really makes it pop. The offsetting of the large stones is very Japanese way to make the garden stroller slow down and really look at the garden. I am always a bit jealous of people that can grow berginia. I think it is the prettiest shape as well as those long lasting blooms in spring. I think it is just too hot and dry here during summer. Thanks for the shout out. Now I will go over to the other blog and have a look.
Good job. It makes me want to go out right now and fix those areas which don't work in my garden.
I'm with you all the way on the washing line dash when the rain starts.
I think you've made a heck of a difference Shirely. In no time it will look like it's always been there. More often than not, redesigning just a small area make a big difference. Well done!
You've certainly been creative Shirl and must be delighted with the results of your labours. That two pronged tool looks most useful. I could do with one. Names of heucheras please?
Hello everyone, thanks for all your comments especially after such a lengthy post 🙂
Sue, thanks, this tweak surprised me 🙂
pontos pontos, welcome and thank-you for your kind comment! (translation: “It's all very nice corner with gravel and water, and the choice of plants seems to me the best! Congratulations :)”
Lisa, thank-you (I’m liking your path edging too). I love your expression ‘pop’ – I’ll remember that now! I’d guess a slight Japanese way has been in my gardening head so long I don’t see it anymore. Shame there isn’t a variety of bergenia you can’t grow – I love its elephant ear leaves especially over winter when they are tinged red. You’re welcome on the shout – I can’t believe the coincidence. I had sorted the order of my photos the night before and got a lovely surprise to see you both had posted too 🙂
L, thanks – now that’s the best comment to receive!!!
Angie, Yep, washing in a garden keeps it real 😉 Thanks, as I said above, only a few plants needed to be moved so that made the difference even more surprising for me 😀
Anna, I do love being creative 🙂 I am thrilled with the feel of this area now. The photos don’t really show how well this whole area all knits together with just with a few pebbles and similar plantings. Ah… I hoped someone would like that tool and I was ready with a link for this invaluable Weeding tool . Heuchera names – orange one is ‘Marmalade’ and I’ve been spreading it all around my garden! The dark red one is either ‘Stormy seas’ or ‘Palace purple’ not sure which one – I must try and find out as it too has been spread all around my garden – I like to tie it in with the garnet foliage Acers 😀
Hi Shirley – that's a great makeover and how amazing that just a few changes can make a huge difference. Thanks for the link love and lovely to see you over at mine earlier in the week 🙂
I have really enjoyed this bit of a garden makeover-I think it looks great.
Isn't it lovely how some small changes can make such a difference. You have a very pretty garden and the revamped area looks great.
Hello everyone, oops sorry for my delay in replies. I've been on holiday and helping my Mum pre and post op 🙂
VP, thanks, I’m always surprised by these small changes. You are very welcome on the link! Looking forward to seeing some of your small changes – ha-ha… maybe they are growing 😉
Suzie, thanks, I’ve not been at home and in the garden a lot lately but wandered by this area yesterday and the black grass especially is looking so well there now where before the change it didn’t look healthy at all!
Paula, thanks, these changes are fun to do too aren’t they? Thanks, I have to confess to a slightly neglected garden at the moment. I need some weeding and deadheading time out there… soon…